Creating Interactive Images in MadCap Flare
I’ll be honest, I’ve only recently discovered HTML image maps and it just so happens that there’s a handy tool in Flare for creating them. To me, image maps hark back to a long forgotten time of whacky, off-the-wall web design. You don’t see many examples of them these days. I worry that there is a reason for this I’ve yet to discover. Anyway, here’s how I made some nice interactive images in Flare using HTML image maps and some JQuery plugins.
See the demo Flare output.
In my projects, I create a master page to handle scripts. In this example, I keep it simple and show all code being added to a single topic.
There are a few JQuery plugins at work here:
- ImageMapster
- Hilight
- Tooltip
To use these in your project, insert the following into the <head> of your image map topic:
  <link href="https://code.jquery.com/ui/1.10.4/themes/ui-lightness/jquery-ui.css" rel="stylesheet" />
    <script src="https://ajax.googleapis.com/ajax/libs/jquery/2.1.1/jquery.min.js">
    </script>
    <script src="http://www.outsharked.com/scripts/jquery.imagemapster.js">
    </script>
    <script src="https://code.jquery.com/ui/1.10.4/jquery-ui.js">
    </script> Now you might run into some trouble as Flare might insert the JQuery library during your build. If you find your image map isn't working, try removing one of the libraries from your build.

<script src="../Resources/Scripts/jquery.min.js" type="text/javascript">
</script>
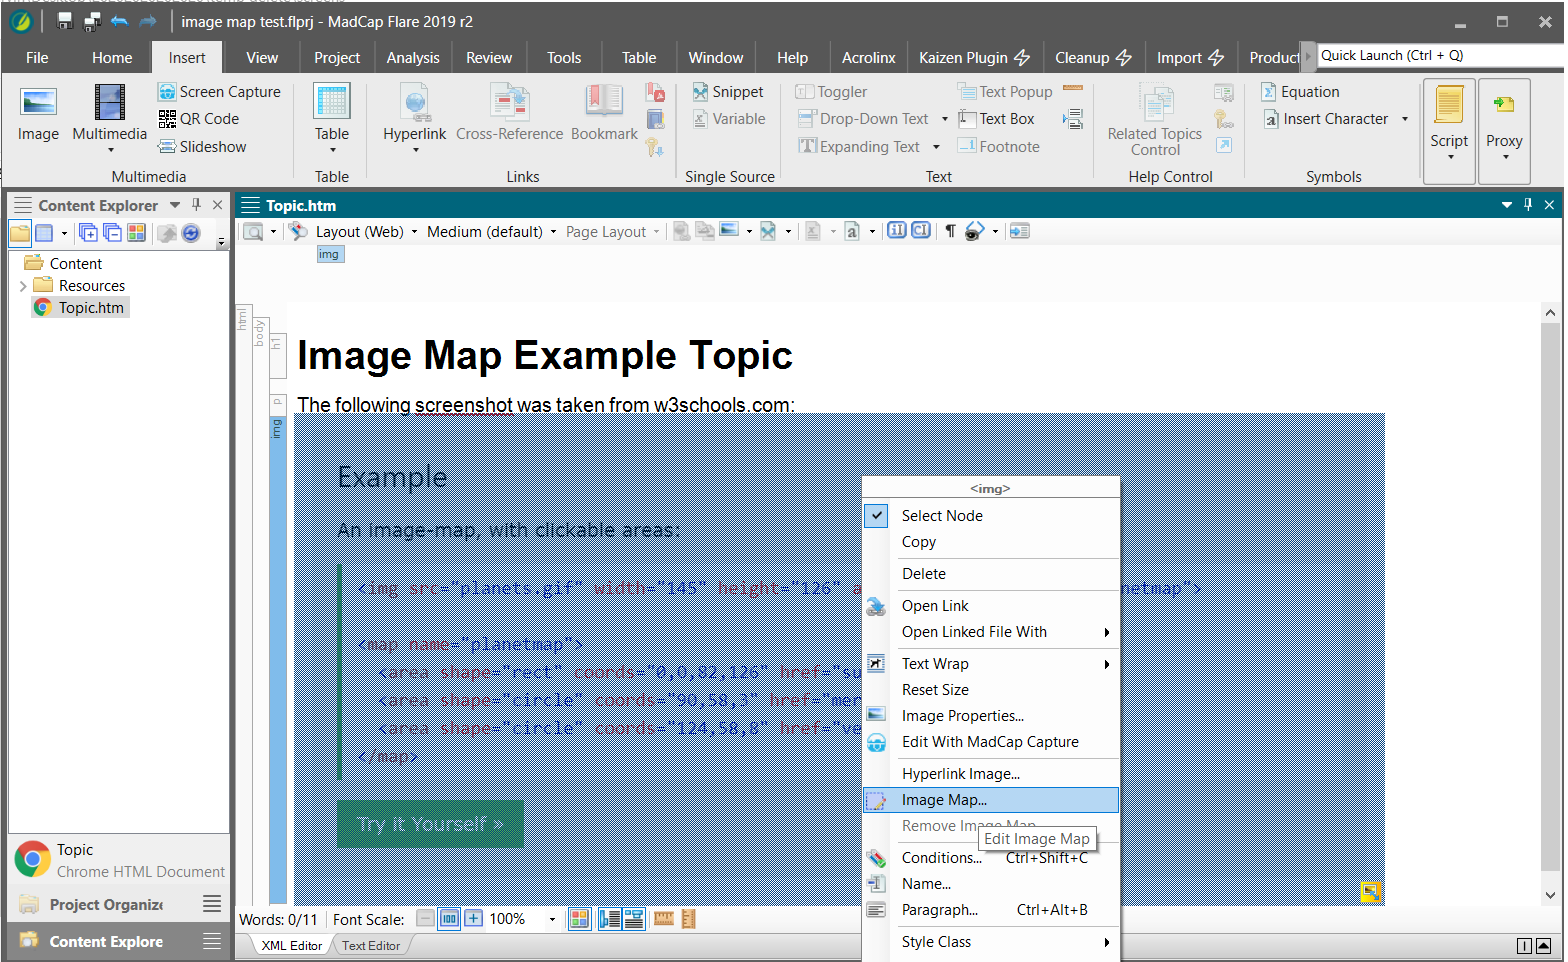
Creating an image map is straightforward in Flare, you right-click an image, and select Image Map….
 In my example, I’ve taken a screenshot of the W3 info on Image Maps. and highlighted two areas.
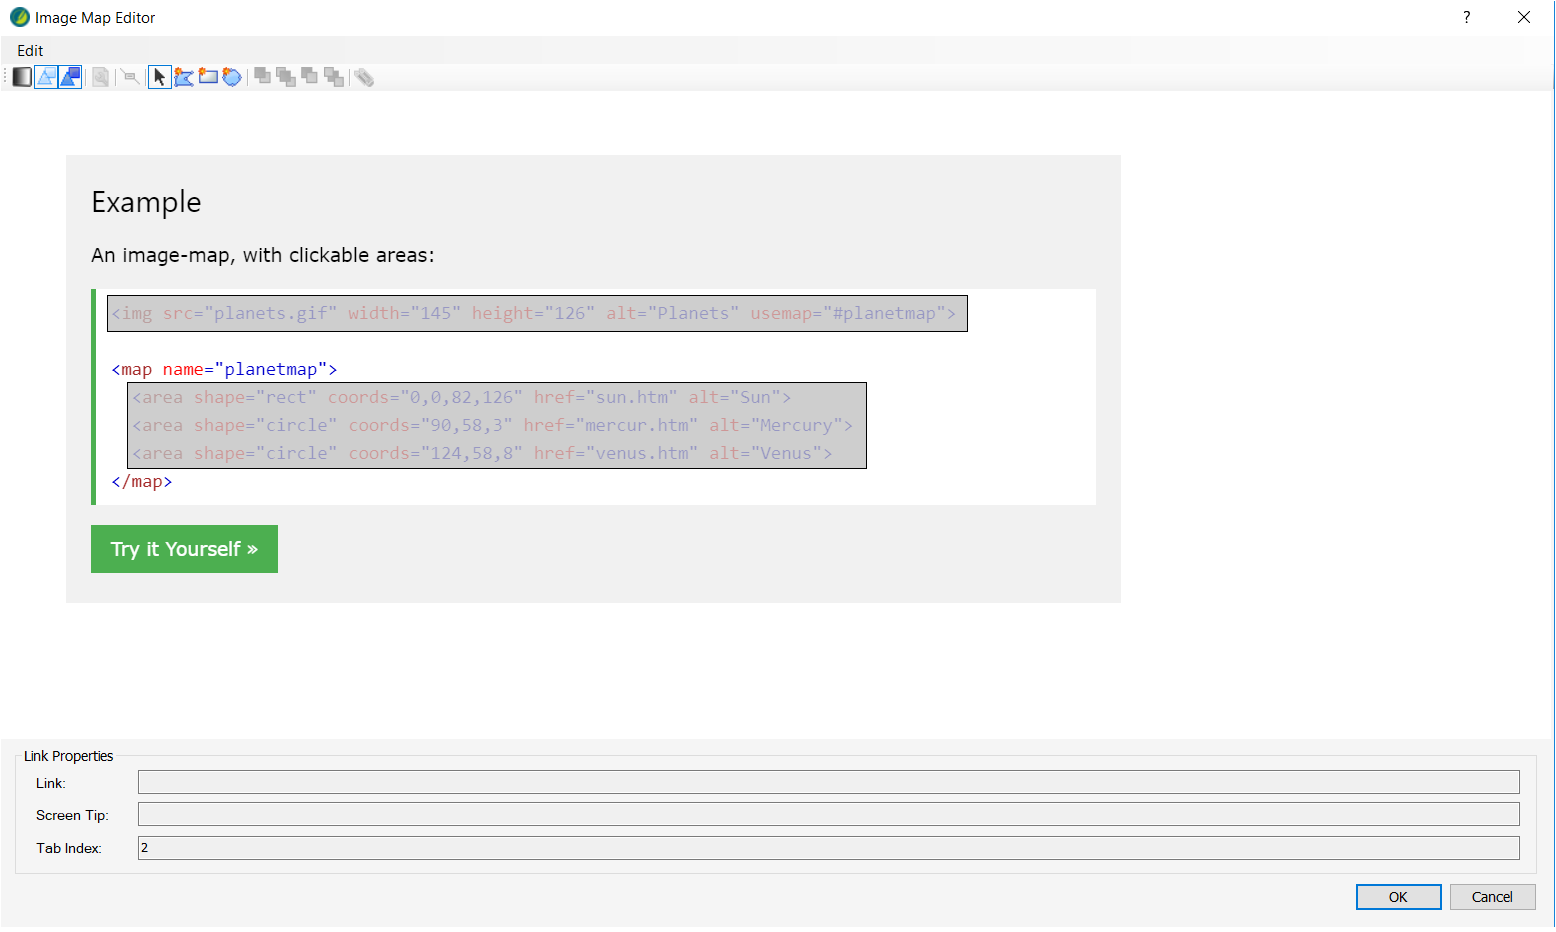
This inserts the image map into your topic. Getting the Flare generated Image Map to link up with the JQuery plugins involved adding some extra IDs and Classes. I’m going to spare you the detail and simply share a working version of a Topic with this all set up. If you create a new topic and paste this into the text editor, it should work.
Complete code example:
<?xml version="1.0" encoding="utf-8"?>
<html xmlns:MadCap="http://www.madcapsoftware.com/Schemas/MadCap.xsd">
    <head>
        <link href="Resources/Stylesheets/Styles.css" rel="stylesheet" type="text/css" />
        <link href="https://code.jquery.com/ui/1.10.4/themes/ui-lightness/jquery-ui.css" rel="stylesheet" />
        <script src="https://ajax.googleapis.com/ajax/libs/jquery/2.1.1/jquery.min.js">
        </script>
        <script src="http://www.outsharked.com/scripts/jquery.imagemapster.js">
        </script>
        <script src="https://code.jquery.com/ui/1.10.4/jquery-ui.js">
        </script>
    </head>
    <body>
        <map name="map1" id="map1">
            <area id="area1" class="tipclass" title="tooltip" shape="rect" data-name="all" coords="56,154,916,190" dragDirection="0" href="#" tabindex="1" />
            <area id="area2" class="tipclass" title="tooltip" shape="rect" data-name="all" coords="76,241,815,327" dragDirection="0" href="#" tabindex="2" />
            <area id="area3" class="tipclass" title="tooltip" shape="rect" data-name="all" coords="1,1,1,1" dragDirection="0" href="#" tabindex="3" />
            <area id="area4" class="tipclass" title="tooltip" shape="rect" data-name="all" coords="1,1,1,1" dragDirection="0" href="#" tabindex="4" />
            <area id="area5" class="tipclass" title="tooltip" shape="rect" data-name="all" coords="2,2,2,2" dragDirection="0" href="#" tabindex="5" />
        </map>
        <h1>Image Map Example Topic</h1>
        <p>The following screenshot was taken from w3schools.com:</p>
        <img src="Resources/Images/w3Screenshot.png" id="exampleImage" class="imageMap" usemap="#map1" />
        <ol style="display: none">
            <li id="1" value="1">This will be the image in your Flare project. We add some extra attributes to the code to get this to work in Flare, for example, 'Class', 'ID', and 'data-name'.</li>
            <li id="2" value="2">This is the  image map, our image maps should be responsive. If you have any problems, try setting the image dimensions inline and removing any CSS resizing.</li>
            <li id="3" value="3">A third option.</li>
            <li id="4" value="4">A fourth option.</li>
            <li id="5" value="5">A fifth?</li>
        </ol>
        <script type="text/javascript">///*<![CDATA[*/

			$(window).load(function(){

			// javascript

			// Set up some options objects: 'single_opts' for when a single area is selected, which will show just a border
			// 'all_opts' for when all are highlighted, to use a different effect - shaded white with a white border
			// 'initial_opts' for general options that apply to the whole mapster. 'initial_opts' also includes callbacks
			// onMouseover and onMouseout, which are fired when an area is entered or left. We will use these to show or
			// remove the captions, and also set a flag to let the other code know if we're currently in an area.
			// take content from ordered list with id's '1','2', etc.


			var string1 = document.getElementById("1").innerText;
			var string2 = document.getElementById("2").innerText;
			var string3 = document.getElementById("3").innerText;
			var string4 = document.getElementById("4").innerText;
			var string5 = document.getElementById("5").innerText;

			document.getElementById('area1').title = string1;
			document.getElementById('area2').title = string2;
			document.getElementById('area3').title = string3;
			document.getElementById('area4').title = string4;
			document.getElementById('area5').title = string5;

			var inArea,
			map = $('#exampleImage'),
			captions = {
			one: [string1],
			two: [string2],
			},
			single_opts = {
			fillColor: '000000',
			fillOpacity: 0,
			//			stroke: true,
			//			strokeColor: 'ff0000',
			//			strokeWidth: 2
			},
			all_opts = {
			fillColor: 'ffff66',
			fillOpacity: 0.5,
			stroke: true,
			strokeWidth: 2,
			strokeColor: 'ffffff'
			},
			initial_opts = {
			mapKey: 'data-name',
			isSelectable: false,
			onMouseover: function (data) {
			inArea = true;


			},
			onMouseout: function (data) {
			inArea = false;

			}
			};
			opts = $.extend({}, all_opts, initial_opts, single_opts);


			// Bind to the image 'mouseover' and 'mouseout' events to activate or deactivate ALL the areas, like the
			// original demo. Check whether an area has been activated with "inArea" - IE<9 fires "onmouseover"
			// again for the image when entering an area, so all areas would stay highlighted when entering
			// a specific area in those browsers otherwise. It makes no difference for other browsers.

			map.mapster('unbind')
			.mapster(opts)
			.bind('mouseover', function () {
			if (!inArea) {
			map.mapster('set_options', all_opts)
			.mapster('set', true, 'all')
			.mapster('set_options', single_opts);
			}
			}).bind('mouseout', function () {
			if (!inArea) {
			map.mapster('set', false, 'all');
			}
			});

			});

		///*]]>*/</script>
        <script>
			$(function() {
			$( ".tipclass" ).tooltip({
			track:true
			})

			});
		</script>
    </body>
</html>
You can use this as a template for creating basic interactive images in Flare. The image has 5 mapped areas and under the image there is an ordered list.
The text from the ordered list is used as the tooltips in your image map, and each mapped area has a Tab Index from 1 to 5.
The ordered list has inline CSS display: none; and is not shown in the output.